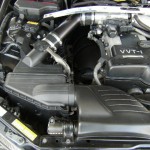
I have received numerous requests for a DIY on my snorkel mod that I detailed in the intelligent modification series from the IS300 community.
It is based on my measurements of restriction in the stock intake system, it does two things: reduces restriction imposed by factory snorkel/airbox, increases the availability of pressurized (higher than atmospheric pressure) air at speed. In effect, it adds additional "ram air" on the highway.
Using a sealed airbox is ideal in any car that will be going through gears frequently (street car, road racing car). The reason is that even if it doesn't produce the highest hp, which sometimes it does, is that transient response is better with an airbox than with an open element air filter. When the throttle closes between shifts for example, the air that was quickly rushing in hits a wall and is forced back down the intake system. In a sealed system, the air actually bounces back and helps ram more air in when the throttle is re-opened. In a open air filter system, the air is lost to the atmosphere and thus power just after a shift is harmed. There are other reasons, but the best "proof" of this is that even the hardcore no-creature comfort exotic cars like the Ferrari Enzo DO NOT use open element air filters, but still - air boxes.
The factory air box generates more and more air pressure as the car speeds up, by replacing the airbox with a "open element" conic filter, you lose that benefit completely. Just pointing the snorkel at it just supplies it with the outside air, not the pressure.
That said, this modification reduced restriction more than the popular "JoeZ" intake and is probably akin to the infamous "Area 51" intake but it costs about $20 to do, less if you already have the hose to do it. As a bonus, it's almost impossible to detect, it adds very little if any noise AND you get to use power tools...
Please read these before doing this (or any air intake) modification on your IS300:
- Intelligent Modification: Measuring Intake Restriction (Part I)
- Intelligent Modification: Measuring The Intake Restriction on Project Lexus (Part II)
- Intelligent Modification: Doing Some Intake Mods on Project Lexus (Part III)
- More Bad News for “Drop-In Air Filters”
- Yet another nail in the coffin for “drop-in” filters…
- MAF vs Differential Pressure for Intake Testing
Hint: One hint that the IS300's snorkel is a tad undersized is the size of the GS300's snorkel. The original 2JZ-GE kidney snorkel was much bigger, but due to packaging reasons the IS300's is a smaller version. The GS300's 2JZ-GE also makes slightly more power (probably due to slightly different intake, header, and exhaust).
What you need for your TU Snorkel Mod
- - 2-2.25" flexible plastic tubing (I used a shop vac hose from Home Depot, $19.99 for way more than I needed). If you can find something flexible with no ridges (smooth inside) that would be BETTER.
- Zip tie (to mount hose to grille)
- Correct size hole saw (2-2.25")
- 10mm socket, extension, ratchet, pliers to remove hose clamps on vacuum hoses.
- Cost is between Free and $20-25, maybe a little more if you need to buy a hole saw.
As a note, the only reason I didn't use a bigger pipe for the snorkel is there's no room. There's no room to install a snorkel anywhere else (under, beside, etc) due to the way the engine bay is built. If you used a terrible filtering, horribly flowing HKS you could fit a better snorkel, but the tradeoffs would be too high. Use a factory air filter for BEST results, period.
Step 1: Get the airbox out
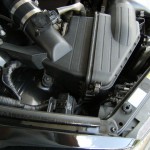
To remove the airbox, just remove the visible 10mm bolts that hold the air box down. If
you have a JoeZ intake or similar, make sure you remove your strut tower bar before doing any of this or you'll scratch it like I did mine. The JoeZ -does- reduce restriction, so I kept mine but this snorkel mod does more in my testing.
Use a screw driver to loosen the clamps on the intake, carefully lift the air box and disconnect the solenoid and vacuum hoses on the driver side of the airbox (on the bottom).
Step 2: Fit the hose
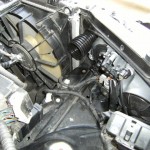
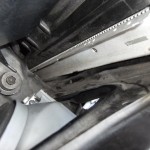
I believe the shopvac hose I used was 2" throughout and 2.25" or 2.5" even at the box. I chose to put the big end going into the box. Route it through the hole as shown beside the passenger side headlight. It will be "crimped" a bit. While that's not ideal, my testing still shows that the net result is a good one. I ran mine down and zip tied it to the lower grille area. I used a black zip tie so it'd blend in. To attach, poke 2 or 3 SMALL holes in the plastic pipe and use those holes to attach the zip tie.
Bonus: If you happen to have a velocity stack laying around or something like that, you might want to attach one here. You can make your own "flared" entry by forcing a piece of straight plastic pipe or something over a bowl or flower pot. I tested mine with a blunt entry and do not know if the velocity stack would help or make no difference.
Step 3: Cut the hole out
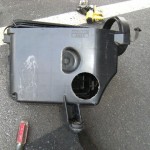
Figure out which size hole saw will allow a nice tight fit into the hole and cut the airbox as shown. The EXACT location isn't that important, but you want it to be straight on. I basically test fit the airbox after putting my piece of shop-vac hose through the area beside the headlight and marked where it would hit.
Step 4: Reinstall
That's pretty much all there is to it. Cut the hose down to size of course. If you have a gap around the sides of the hose, I suggest using a cut up beer koozie (neoprene sleeve) to wrap around and create a tight seal. I don't recommend using silicone or anything like that as anytime you want to remove the airbox you'd have to redo the silicone. A fairly tight fit is good enough, it doesn't have to be water tight or anything like that.
Step 5: PROFIT!
For $20 you just did more for your IS300 than other intake systems available for the car. The additional "ram air" will also help some with your highway mileage by reducing pumping losses. Pumping losses are basically losses caused by running your engine with the throttle only slightly open. The engine has to work very hard to pull air around the throttle and thus efficiency is lost. No worries about hydrolock, even if the secondary snorkel becomes completely submerged, the primary snorkel will provide more than enough air flow to keep the secondary from sucking up water.
You may (just like the factory system) note some water drops get in the box after a car wash or heavy rain, but that's no big deal and it happens in the OEM configuration as well.
If you find a good source of a piece of tubing that is smooth and fits, please post a comment of where to get it. Also, if you do any actual testing and get a "better" design, please also comment on that so everyone can see that. I myself will probably not do much more with this project but I'm happy to pass along information.
Extremely Limited Time Offer - 3 Days Only
Get a MASTERS DEGREE in Performance Tuning from the BEST in the Field for ONE low package price
For 3 days only, get ALL of our PREMIUM (not available anywhere else) Tuner University Courses featuring some of the greatest minds in motorsports:
- Top 10 Performance Myths Class (MP3 and Edited Transcript) - $29.95 value
- Performance on a Sip of Fuel Class (MP3 and class manual) - $69.95 value
- Header Design Secrets with John Grudynski (MP3 and transcript) - $69.95 value
- Dirty Secrets of Oil with Ryan Stark (MP3 and transcript) - $69.95 value
- Engine Tuning Secrets with Ben Strader of EFI University (MP3 and Transcript) - $69.95 value
Get all of the above courses (many of which not currently available anywhere else) for one single price of just $309.75 $69.95. A HUGE package savings.
You can also buy any of these individually through our resource center, but I don't know why you would as this is basically the whole store for the price of just 1 course. You'll get the MP3 recordings of each class as well as a transcript or companion manual with each course and you'll be able to download them all INSTANTLY.

